YOLOv8 Red & Green Object Detection
Published:
YOLOv8 Red & Green Object Detection
Raspberry Pi Deployment Guide
This project demonstrates how to train, convert, and deploy a YOLOv8 model for red and green color object detection using a dataset from Roboflow.
⚙️ Configuration Overview
| Item | Description | Recommended |
|---|---|---|
| Model Architecture | YOLOv8n (Nano) | Lightweight for Raspberry Pi |
| Image Size | 320 × 320 | Balance between accuracy and speed |
| Batch Size | 16 | Adjust if memory is limited |
| Training Epochs | 200 | Stop earlier if loss stabilizes |
| Confidence Threshold | 0.4–0.5 | Filter weak detections |
| ONNX Opset Version | 12 | Compatible with ONNX Runtime 1.16+ |
| Raspberry Pi Model | Pi 4 (2GB to 4GB) | 64-bit OS recommended |
| Camera | USB or CSI camera | Test with cv2.VideoCapture(0) |
| Python Version | 3.10+ | Ensure venv and pip installed |
1. Download Dataset from Roboflow
You will train the model using a dataset hosted on Roboflow.
- Open your dataset page on Roboflow: 👉 YOLOv8 Red-Green Detection Dataset
Click Download Dataset → YOLOv8 format
Then extract it inside your project folder.The folder structure should look like this:
├── train/
├── valid/
├── data.yaml
- Inside your
data.yaml, confirm that it contains something like this:train: ../train/images val: ../valid/images nc: 2 names: ['redbox', 'greenbox']
2. Set Up Training Environment (on Windows)
This section explains how to prepare your environment on Windows for training YOLOv8.
- Open PowerShell in your project folder.
Create a new Python virtual environment: ```bash python -m venv yolo
Activate the environment: ```bash .\yolo\Scripts\activate
PyTorch CUDA build (current default index provides CUDA-enabled wheels) ``` pip install –upgrade pip pip install torch torchvision torchaudio –index-url https://download.pytorch.org/whl/cu121
# Ultralytics (YOLOv8) pip install ultralytics
- Verify installation:
yolo version
## 3. Train the YOLOv8 Model
Train your YOLOv8 model using your Roboflow dataset.
yolo detect train model=yolov8n.pt data=data.yaml imgsz=320 epochs=10 batch=16 device=0 ``` we use the device=0 to train using GPU. If your laptop doesn’t have the gpu, you can train on google colab
After training, your weights will be located at:
runs\detect\train\weights\best.pt
4. Testing the model on Laptop
Below code is used for testing model and detection with best.pt on laptop
from ultralytics import YOLO
import cv2

# --- Load your trained YOLOv8 model ---
model = YOLO("best.pt")   # make sure best.pt is in the same folder as this script

# --- Open webcam (0 = default cam, or replace with video path or image folder) ---
cap = cv2.VideoCapture(0)   # use 0, 1, or a file path like 'video.mp4'

if not cap.isOpened():
    print("Cannot open webcam")
    exit()

print("✅ Webcam opened successfully. Press 'q' to quit.")

while True:
    ret, frame = cap.read()
    if not ret:
        print("Frame grab failed.")
        break

    # --- Run YOLOv8 inference on the frame ---
    results = model(frame, stream=True)

    # --- Process detections ---
    for r in results:
        boxes = r.boxes
        for box in boxes:
            cls_id = int(box.cls[0])
            conf = float(box.conf[0])
            label = model.names[cls_id]

            # Get coordinates
            x1, y1, x2, y2 = map(int, box.xyxy[0])

            # Draw box and label
            color = (0, 255, 0) if label == "greenbox" else (0, 0, 255)
            cv2.rectangle(frame, (x1, y1), (x2, y2), color, 2)
            cv2.putText(frame, f"{label} {conf:.2f}", (x1, y1 - 10),
                        cv2.FONT_HERSHEY_SIMPLEX, 0.7, color, 2)

            print(f"Detected: {label} (conf {conf:.2f})")

    # --- Show the result ---
    cv2.imshow("YOLOv8 Detection", frame)

    # Exit on 'q'
    if cv2.waitKey(1) & 0xFF == ord('q'):
        break

cap.release()
cv2.destroyAllWindows()
5. Export Model to ONNX (For Raspberry pi)
yolo export model=best.pt format=onnx imgsz=320 opset=12 dynamic=False simplify=False nms=True
6. Transfer Model to Raspberry pi
scp best.onnx aupp@pi-ip:/home/aupp/Documents/
7. Create and activate virtual environment
python3 -m venv ~/yolo && source ~/yolo/bin/activate
Install Python Package
pip install --upgrade pip
pip install "numpy==1.23.5" onnxruntime==1.16.3 flask==3.0.0 opencv-python-headless==4.9.0.80
8. Testing ONNX on The webstream with Raspberry pi
The code below is used for testing the model of the red-green detection with rapberry pi
#!/usr/bin/env python3
import os, time, cv2
from threading import Thread, Lock
from flask import Flask, Response, jsonify, make_response
from ultralytics import YOLO

# -------- config --------
MODEL_PATH = "onnx_path"   # put best.onnx next to this app.py
CAM_INDEX  = 0
IMG_SIZE   = 320

CONF       = 0.5

# -------- model --------
model = YOLO(MODEL_PATH)

# -------- camera thread --------
class Camera:
    def __init__(self, index=0, width=None, height=None):
        self.cap = cv2.VideoCapture(index)
        if width:  self.cap.set(cv2.CAP_PROP_FRAME_WIDTH,  width)
        if height: self.cap.set(cv2.CAP_PROP_FRAME_HEIGHT, height)
        self.ok, self.frame = self.cap.read()
        self.lock = Lock()
        self.running = True
        self.t = Thread(target=self.update, daemon=True)
        self.t.start()

    def update(self):
        while self.running:
            ok, f = self.cap.read()
            if ok:
                with self.lock:
                    self.ok, self.frame = ok, f
            else:
                time.sleep(0.01)

    def read(self):
        with self.lock:
            return self.ok, None if self.frame is None else self.frame.copy()

    def release(self):
        self.running = False
        time.sleep(0.05)
        self.cap.release()

cam = Camera(CAM_INDEX)

# -------- flask --------
app = Flask(__name__)

INDEX_HTML = """<!doctype html>
<html lang="en">
<head>
  <meta charset="utf-8">
  <title>YOLOv8 ONNX - Raspberry Pi Stream</title>
  <meta name="viewport" content="width=device-width,initial-scale=1">
  <style>
    :root { color-scheme: light dark; }
    body { margin:0; min-height:100vh; display:grid; place-items:center;
           background:#0b0c10; color:#eaf0f6; font-family:system-ui,Segoe UI,Roboto,sans-serif; }
    .card { width:min(96vw,900px); background:#111417; border-radius:16px; padding:14px;
            border:1px solid rgba(255,255,255,0.08); box-shadow:0 10px 40px rgba(0,0,0,.35); }
    h1 { margin:6px 0 10px; font-size:1.05rem; }
    .row { display:flex; gap:10px; justify-content:space-between; align-items:center; }
    .btn { border:1px solid rgba(255,255,255,.12); background:#1b2229; color:#eaf0f6;
           padding:6px 12px; border-radius:10px; cursor:pointer; font-weight:600; }
    .btn:hover { background:#222b33; }
    .frame { width:100%; aspect-ratio:16/9; background:#0d1117; border-radius:12px; overflow:hidden;
             border:1px solid rgba(255,255,255,0.08); display:grid; place-items:center; }
    img { width:100%; height:100%; object-fit:contain; }
    small { opacity:.65; }
  </style>
</head>
<body>
  <div class="card">
    <div class="row">
      <h1>Raspberry Pi • YOLOv8 (ONNX) Live</h1>
      <button class="btn" onclick="reloadStream()">Reload</button>
    </div>
    <div class="frame">
      <img id="stream" src="/stream" alt="Stream">
    </div>
    <div class="row" style="margin-top:8px;">
      <small>Status: <span id="health">checking…</span></small>
      <small>URL: <code id="url"></code></small>
    </div>
  </div>
<script>
  async function checkHealth() {
    try {
      const r = await fetch('/health', {cache:'no-store'});
      const j = await r.json();
      document.getElementById('health').textContent = j.camera_ok ? 'camera OK' : 'no camera';
    } catch (e) {
      document.getElementById('health').textContent = 'server offline';
    }
  }
  function reloadStream() {
    const img = document.getElementById('stream');
    img.src = '/stream?ts=' + Date.now();
  }
  document.getElementById('url').textContent = location.href;
  checkHealth(); setInterval(checkHealth, 4000);
</script>
</body></html>
"""

@app.route("/")
def index():
    return make_response(INDEX_HTML, 200)

@app.route("/health")
def health():
    ok, _ = cam.read()
    return jsonify({"camera_ok": bool(ok)})

def gen_mjpeg():
    while True:
        ok, frame = cam.read()
        if not ok or frame is None:
            time.sleep(0.02)
            continue
        results = model.predict(frame, imgsz=IMG_SIZE, conf=CONF, verbose=False)
        annotated = results[0].plot()
        # optional resize to cut bandwidth/CPU:
        # annotated = cv2.resize(annotated, (640, 360))
        ok, jpg = cv2.imencode(".jpg", annotated, [cv2.IMWRITE_JPEG_QUALITY, 80])
        if not ok:
            continue
        b = jpg.tobytes()
        yield (b"--frame\r\n"
               b"Content-Type: image/jpeg\r\n"
               b"Cache-Control: no-cache\r\n"
               b"Content-Length: " + str(len(b)).encode() + b"\r\n\r\n" + b + b"\r\n")

@app.route("/stream")
def stream():
    return Response(gen_mjpeg(), mimetype="multipart/x-mixed-replace; boundary=frame")

if __name__ == "__main__":
    try:
        app.run(host="0.0.0.0", port=5000, threaded=True)
    finally:
        cam.release()
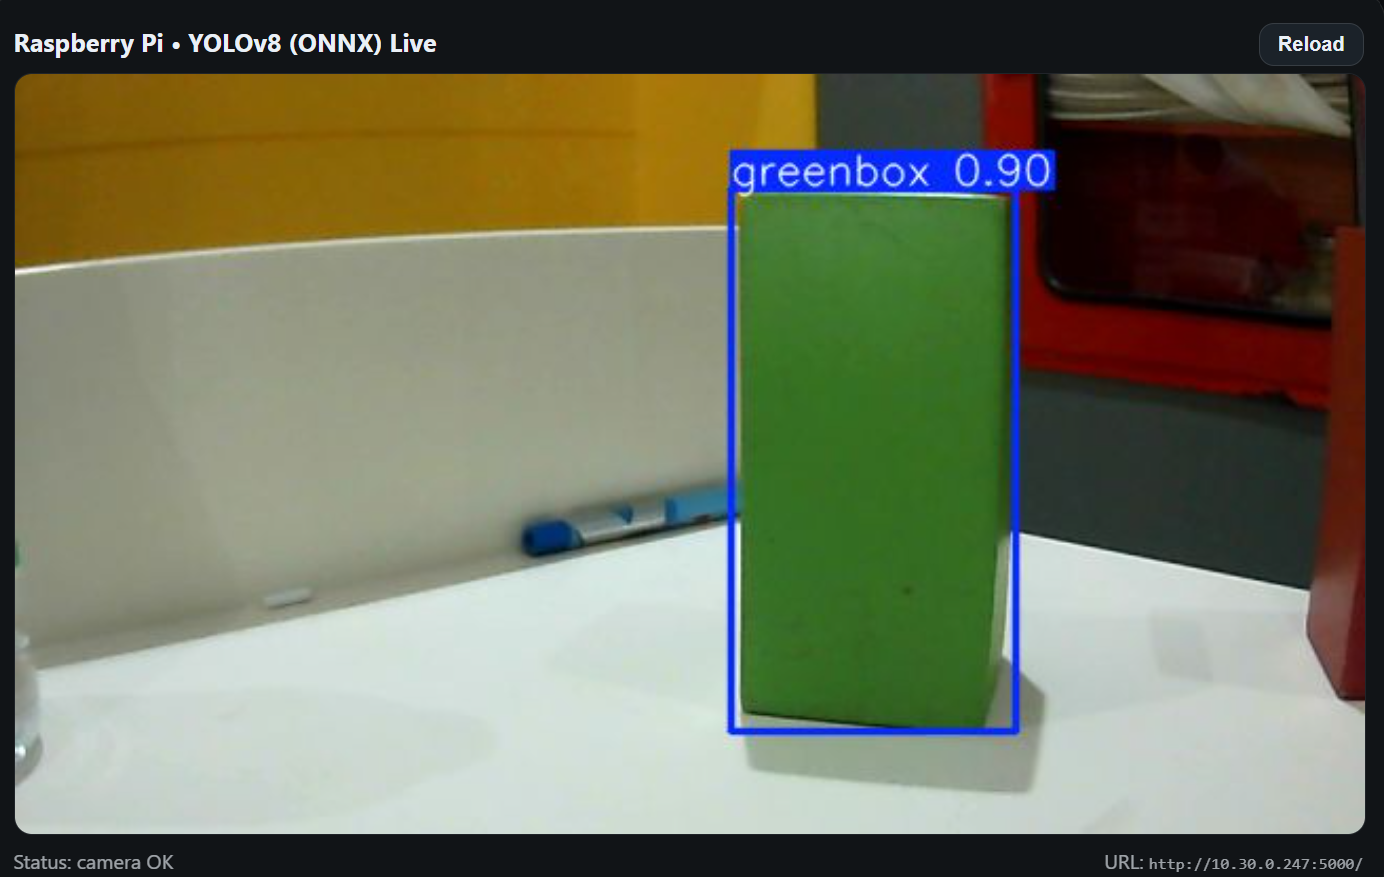
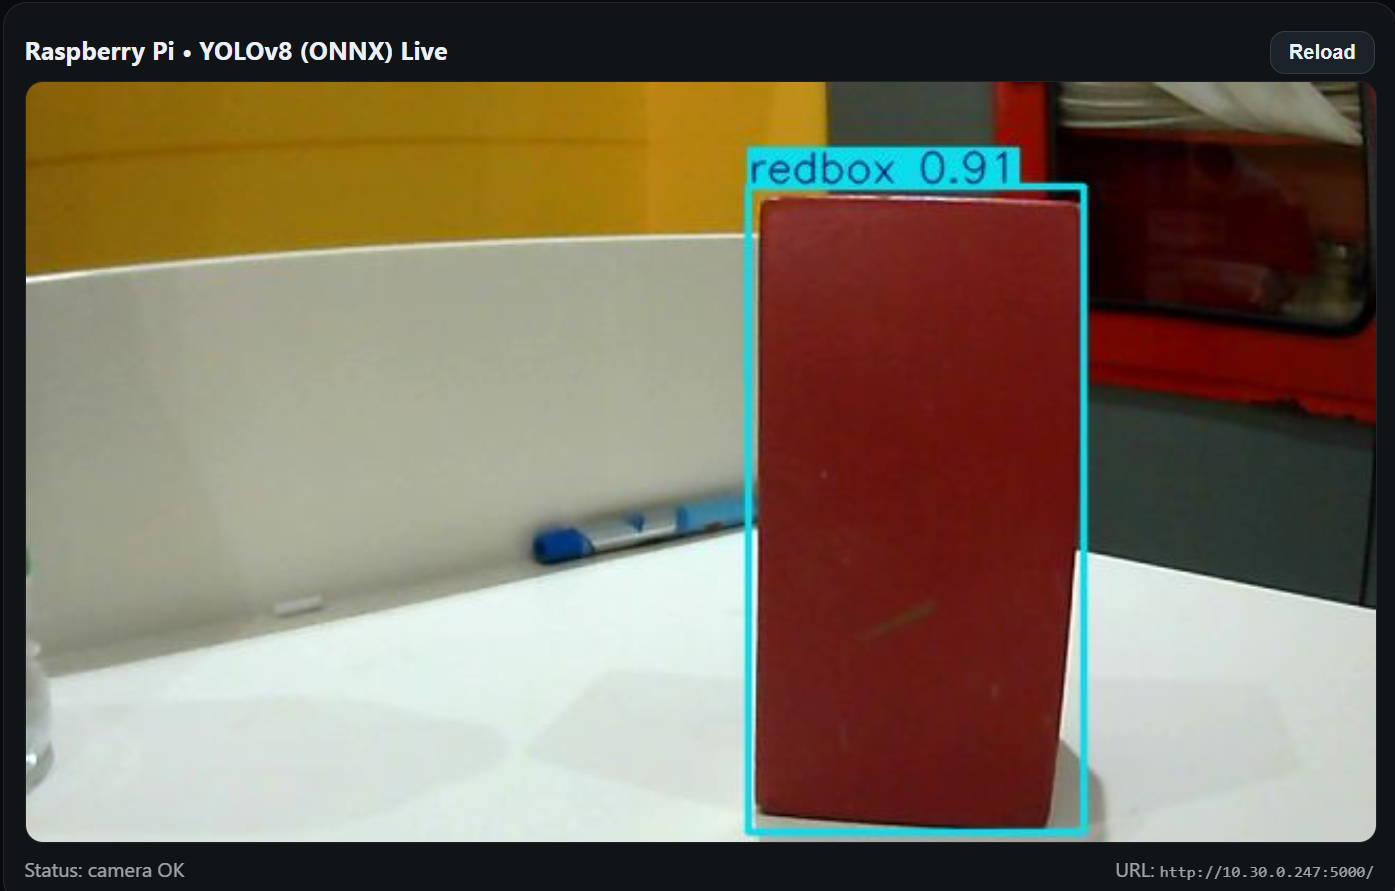
After that You will see the output as shown in the image below
-> Red Detection
-> Green Detection